|
Excavation of
dirt and raising the lower end.
We Needed to build up the lower end as that section
was on a hillside. As we removed dirt from the top we layered
it and compacted it so that we would have a solid
sub-base. We let the base slope naturally as we would
not be building a retaining wall. Instead we dug into
the finished sub-base and inserted cinderblocks to create a
foundation on which to lay or base materials. We set the
cinderblocks by driving 3 foot stakes into our sub-base.
The cinderblocks were then filled and tamped. We covered the
cinderblocks with dirt and graded and tamped the entire
area. We checked our level and grade before adding the
base material. |
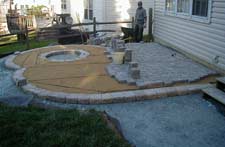
Select
the images for a larger view.
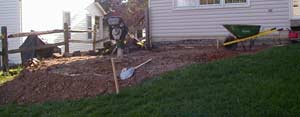
View of excavation.
|
|
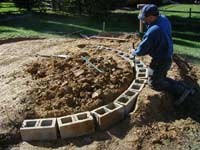
Julio driving 3 foot
stakes.
|
First layers of base applied.
|
Adding base material and sand.
The base material was added in layers tamping all the
while. Then we began the main level of the patio.
The main patio was to be higher then the grass and landing
level so we added blocks on all the outer edges including the fire pit. |
|

Base all tamped and sand
being applied.
|
We then layered more base material inside of the blocks
tamping and filling until we had reached a level 1 inch
below the tops of the blocks.
We were now ready to add the sand and begin to screed.
We covered the base material with sand to a depth
of 1 inch using metal pipes as guides. We left the
area for the fire pit empty. Later it will receive a
small quantity of sand at the bottom to help maintain a
clean appearance.
Once the sand was all filled in we began laying our
pavers. |
|
|
Laying
the pavers.
We began laying the pavers starting at the house
and worked our way to the outside edge. The pavers
were selected from different pallets to maintain
randomness of coloring throughout the patio. Also
care was given in the pattern being applied.
Laying the inside of the patio is quite rapid - things
slow down when you come to the arced edges.
Because we had measured out our patio the sides needed
no cutting but the pavers at the arcs all had to be
cut. Once everything was fitting the pavers on the
outside edges were glued with concrete adhesive to the underlying
blocks.
|
Pavers being laid.
|
|
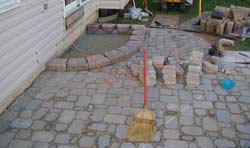
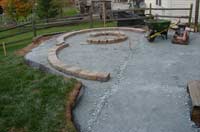
Finishing
the main patio.
Once the adhesive had set we spread sand all over the
patio and using pad tamper we began the setting process.
As we passed the tamper over the pavers the vibration knocked
the sand particles down into the spaces between the
pavers. At the same time the pavers were being set into
the sand and leveling out. We added sand and passed the
tamper over the pavers three more times before the patio could
take no more. We checked for any low spots removing the
pavers in those areas adding sand and then resetting them. |
|

Lower landing ready to be
cut.
|
Working
on the lower landing.
The lower landing is level with the grass and
will also be the base for the steps. We left the
existing steps in place and worked around them. We
did this so that the customers could let their pets out
and have access to their yard. The lower landing
is held in place by plastic edging around the outside
and by base material on the inside. |
|